Shingle roof repair is a crucial maintenance task for homeowners looking to protect their property from weather and environmental damage. Over time, roofs can suffer from wear and tear due to various factors such as age, weather conditions, and poor installation. A well-maintained shingle roof not only enhances the aesthetic appeal of a home but also ensures safety and longevity. While some may consider professional services, others may choose a DIY approach.
Understanding the importance of roof repair and the process involved is essential to make an informed decision.
1. What Tools and Materials Are Needed for Shingle Roof Repair?
1.1 Essential Tools for DIY Repairs
Proper tools are vital for any DIY shingle roof repair project. Basic tools include a hammer, roofing nails, a utility knife, and a pry bar. Additional specialty tools may involve a shingle cutter, roofing hatchet, and nail gun, which can expedite the repair process. Investing in quality tools not only boosts efficiency but also ensures safety, reducing the risk of accidents. Having the right tools at your disposal simplifies the repair task significantly.
1.2 Recommended Materials for Long-Lasting Results
The quality of materials used in shingle roof repair significantly affects the durability and lifespan of the repair. High-grade shingles, matching the existing ones, are crucial to maintain uniformity and functionality. Additionally, waterproof roofing felt and sealants provide an extra layer of protection against moisture infiltration. In some cases, flashing and drip edge materials may also be necessary to prevent leaks. Using reputable brands ensures the reliability of the materials.
1.3 Safety Equipment and Precautions
Safety should always be a top priority when conducting roof repairs. Essential safety equipment includes a sturdy ladder, a harness, non-slip shoes, and a hard hat. Ensuring the ladder is stable and secure before climbing is critical to prevent falls. It is also wise to have someone nearby for assistance, especially when working at heights. Observing safety protocols minimizes risks and ensures a smoother repair process.
1.4 Where to Source Quality Materials
Finding high-quality roofing materials can be accomplished through several channels. Local hardware stores often stock a basic range of materials and tools necessary for roofing repairs. Specialized roofing supply companies offer a more comprehensive selection, including higher-quality options for serious projects. Shopping online can provide additional choices and competitive pricing but requires attention to detail to ensure compatibility. It is advisable to read reviews and verify product authenticity before purchase.
1.5 Cost Considerations for Tools and Materials
Estimating the cost of tools and materials is crucial for budget planning in a shingle roof repair project. While initial expenses may seem high, investing in durable tools and materials can save money in the long run by reducing the need for frequent repairs. It is beneficial to compare prices across suppliers to find the best deals. Cost also varies based on the specific requirements of the roof repair, such as the extent of damage and the roof’s total area. Carefully balancing quality and cost ensures effective and economical repairs.
2. How to Identify Damage or Wear in Shingles?
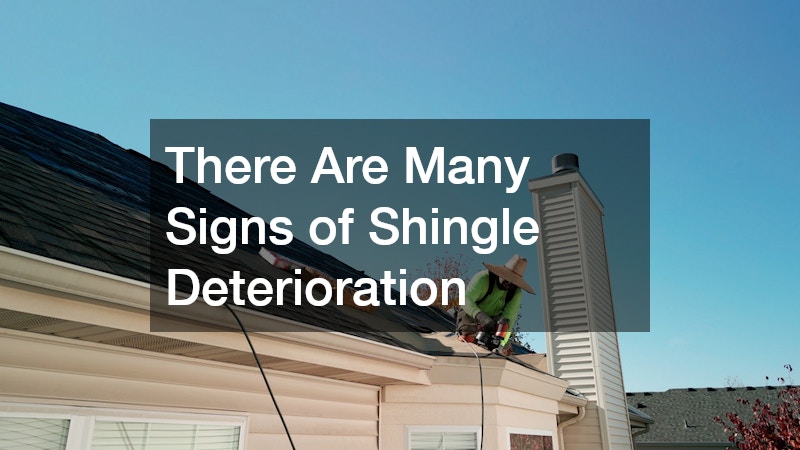
2.1 Signs of Shingle Deterioration
Identifying shingle deterioration early can prevent more costly repairs down the line. Common signs of damage include curling, cracking, and blistering shingles, which are often caused by extreme weather conditions and age. Granule loss is another indicator, typically evident when shingles appear bald or discolored. Water stains on ceilings or walls may also signify a roof leak. Regular visual inspections are crucial to catch these signs promptly.
2.2 Tools for Inspecting Roof Damage
Reliable tools facilitate the accurate assessment of roof damage. A pair of binoculars can be handy for initial inspections from ground level to spot obvious issues. Climbing onto the roof with a sturdy ladder allows for a closer examination, using a flashlight to spot any gaps or damages. A moisture meter helps detect hidden water intrusion areas. Employing these tools enhances the accuracy of the inspection process.
2.3 Distinguishing Between Superficial and Severe Damage
Understanding the difference between superficial and severe shingle damage dictates the necessary repair approach. Superficial damage, such as minor cracks or small areas of granule loss, can often be patched or sealed. Severe damage, indicated by large areas of missing shingles or extensive water damage, may necessitate a full section replacement. Consulting a professional can help evaluate the severity accurately. Addressing the correct level of damage ensures efficient and effective repairs.
2.4 Common Causes of Shingle Damage
Various factors contribute to shingle damage that homeowners should be aware of. Weather extremes, such as heavy rain, snow, hail, and wind, are leading causes of wear and tear. Poor installation and quality of materials can also predicate premature deterioration. Overhanging tree branches pose risks by directly damaging shingles or promoting moss growth. Regular maintenance, including cleaning gutters and trimming trees, mitigates these potential threats.
2.5 Seasonal Inspection Tips
Conducting seasonal inspections helps maintain the integrity of the shingle roof over time. Post-winter inspections reveal potential ice damage or leaks caused by melted snow. Spring and fall are ideal times to check for any storm-induced wear. In summer, inspecting for signs of dryness and cracking due to sun exposure is important. Documenting findings each season contributes to better maintenance planning and decision-making.
3. What Are the Steps in Replacing Damaged Shingles?
3.1 Preparing the Roof for Shingle Replacement
Proper preparation is essential for successful shingle replacement. Start by clearing debris and ensuring the roof is dry to prevent accidents. Mark the damaged areas clearly to avoid missing any during the repair process. Precise measurements for new shingles ensure a perfect fit and function. Adequate preparation minimizes mistakes and enhances repair efficiency.
3.2 Safely Removing Damaged Shingles
Removing damaged shingles requires careful handling to protect surrounding areas. A pry bar can be used to gently lift and detach the affected shingles. Removing nails or fasteners carefully prevents additional damage to adjacent shingles. It is important to work systematically to avoid missing any sections. Safe, methodical removal lays the foundation for effective shingle replacement.
3.3 Laying New Shingles
Laying new shingles demands precision and attention to detail for optimal roof protection. Ensure that replacement shingles align with existing ones to maintain uniformity and aesthetic appeal. Secure each shingle with nails placed strategically to prevent wind damage. Following manufacturer guidelines for shingle overlap ensures adequate water runoff and durability. Properly laid shingles protect the roof from environmental elements and extend its life.
3.4 Sealing and Securing the New Installation
Sealing the shingle edges after installation is vital for weatherproofing the roof. Apply a high-quality sealant along shingle edges to prevent water infiltration. This step helps secure the shingles against strong winds and other weather conditions. Allowing sufficient time for the sealant to cure enhances its effectiveness. A well-sealed roof is essential for long-term protection against leaks and damage.
3.5 Final Checks and Maintenance Advice
Performing final checks after shingle installation ensures everything is secure and functional. Inspect the newly installed section for any loose shingles or nails that may have been missed. A thorough assessment identifies areas needing adjustment before concluding the project. Establishing ongoing maintenance plans, including periodic inspections and cleaning, promotes roof longevity. Regular care prevents potential issues and costly repairs over time.
4. Can Shingle Roof Repair Be a DIY Project?
4.1 Pros and Cons of DIY Shingle Repairs
DIY roof repairs offer both advantages and disadvantages to homeowners. The primary benefit is cost savings, as labor fees for professionals are avoided. Additionally, tackling the repair yourself can be a rewarding learning experience. However, without proper skills, there’s a risk of incomplete or incorrect repairs. Evaluating personal ability is key to a successful DIY project outcome.
4.2 Skill Levels Required for Different Repair Types
Understanding the skill level required for various repairs is crucial in determining DIY feasibility. Simple repairs, like replacing a few shingles, can be managed by those with basic DIY skills. More complex tasks, such as addressing significant leaks or large-scale replacements, require advanced skill and experience. Misjudging capability can lead to improper fixes and potential safety hazards. Assessing skills accurately guides better repair planning.
4.3 Common Mistakes and How to Avoid Them
Avoiding common mistakes during DIY repairs improves outcomes and reduces long-term costs. One frequent error is using mismatched shingles, which can lead to poor roof aesthetics and performance issues. Skimping on quality materials and tools often results in short-lived repairs. Overestimating one’s abilities can result in incomplete or unsafe repairs. Careful planning and adherence to best practices avoid such pitfalls.
4.4 When to Call a Professional
Recognizing when professional intervention is necessary prevents exacerbating roof issues. Complex repairs, extensive structural damage, or inaccessible areas often warrant skilled professionals. Additionally, if previous DIY attempts have failed or increased damage, professional help ensures a proper resolution. Professionals offer warranties and assurances for their work, adding a layer of confidence. Understanding limitations and seeking expert help when needed prevents costly long-term consequences.
4.5 Resources for Learning DIY Repairs
Numerous resources are available for homeowners interested in learning DIY roof repairs. Online tutorials, videos, and step-by-step guides offer visual and written insights. Local workshops and DIY clinics provide hands-on experience under expert guidance. Home improvement books and magazines are traditional yet effective sources for enhancing skills. Leveraging these resources supports ongoing learning and successful DIY efforts.
5. How to Prevent Future Shingle Damage?
5.1 Regular Maintenance Practices
Regular maintenance is key to preventing shingle roof damage and prolonging roof life. Cleaning gutters regularly reduces the risk of water backflow and roofing complications. Trimming overhanging tree branches prevents direct damage and moisture retention. Conducting routine inspections to spot issues early avoids costly repairs. Establishing a maintenance routine ensures proactive roof care and protection.
5.2 Protective Treatments and Coatings
Applying protective treatments can enhance shingle durability against harsh elements. Coatings such as UV protectants help shield shingles from sun damage and fading. Waterproof sealants are effective in preventing moisture infiltration and associated problems. Treatments should be applied following manufacturer guidelines for the best results. Investing in protective measures reduces the risk of premature roof deterioration.
5.3 Importance of Proper Ventilation
Proper ventilation plays a crucial role in maintaining the longevity of shingle roofs. Adequate airflow prevents moisture buildup, reducing the risk of mold and rot. Ventilation helps regulate attic temperatures, minimizing heat-related shingle damage. Installing the right vents and ensuring they function correctly optimizes airflow. Maintaining good ventilation maintains roof health and performance.
5.4 Dealing with Environmental Factors
Environmental factors significantly influence the wear of shingle roofs, necessitating proactive measures. Installing ice and water shields protects against harsh winter conditions and ice dams. Selecting weather-resistant shingles tailored to local climate conditions enhances resilience. Seasonal adjustments, like temporary coverings or supports, combat unique weather patterns. Understanding and addressing environmental challenges safeguard roof longevity.
5.5 Monitoring with Professional Inspections
Regular professional inspections offer a consistent evaluation of the roof’s condition. Experts can spot hidden problems and potential future threats that may go unnoticed by homeowners. A professional inspection typically includes checking the integrity of shingles, flashing, and overall structural soundness. Scheduling inspections every few years ensures prompt attention to emerging issues. Trusting professionals for thorough assessments reinforces shingle care and upkeep.
In summary, shingle roof repair is an essential aspect of home maintenance, requiring appropriate tools, materials, and techniques. Regular inspection and repair prolong the life of roofing, ensuring safety and cost-effectiveness. Weighing DIY options against professional help, alongside preventive measures, can lead to sustained roof performance. By understanding these fundamentals, homeowners can effectively manage and preserve their shingle roofing systems.